Firstly, you'll need to add a NetSuite Connection when logged into the iForms web portal via Connected Data>Connections.
What you'll need from your NetSuite account to authenticate the connection between the two systems is as follows.
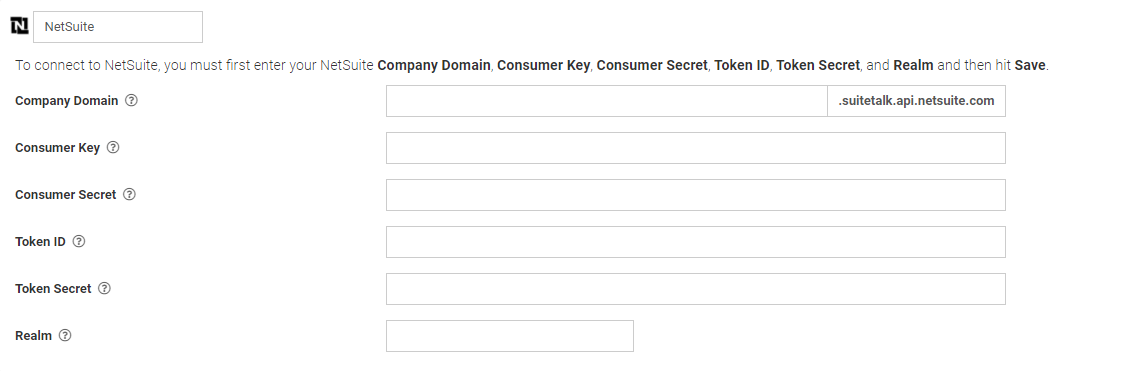
How to acquire the following after logging into your NetSuite account:
- Company Domain
- Consumer Key & Secret
- Token ID & Secret
- Role Permissions
- Creating an Access Token
- Realm
- Enable Features
- Troubleshooting
Company Domain
Your browser's URL will display the info required.

Consumer Key & Secret
Navigate to Setup>Integration>Manage Integrations.

On the Integration page, you can either edit an existing integration and reset credentials to acquire a new Consumer Key & Secret, if not saved initially, or create a new integration for the connection.
Creating a New Integration
An integration name will be required and make sure ONLY Token-Based-Authentication is ticked.

After saving, the integration's Consumer Key & Secret will be available.

Token ID & Secret
Firstly, you'll need to ensure a Role has been created with the correct permissions and level set up before creating an Access Token.
Role Permissions
Navigate to Setup>Users/Roles>Manage Roles.

Either edit an existing role or create a new one with the following permissions and levels.
Under a Role's Permissions>Reports:
- Account Details (view)

Under a Role's Permissions>Setup:
- Log in using Access Token (full)
- REST Web Services (full)
- SuiteAnalytics Connect (full)
- SuiteScript (view)
- User Access Token (full)

After saving, you'll need to specify this role when creating an Access Token.
Creating an Access Token
Navigate to Setup>Users/Roles>Access Tokens.

On the Access Tokens page, create a New Access Token.

On the Access Token page.
- Select the application name to be the integration that the Consumer Key & Secret were previously acquired
- Select your user
- Select the role with the correct permissions previously setup
- Customise the token name if needed

After saving, the Token ID & Secret will be available.

Realm
Navigate to Setup>Company>Company Information.

On the Company Information page, the Account ID is the realm info required.

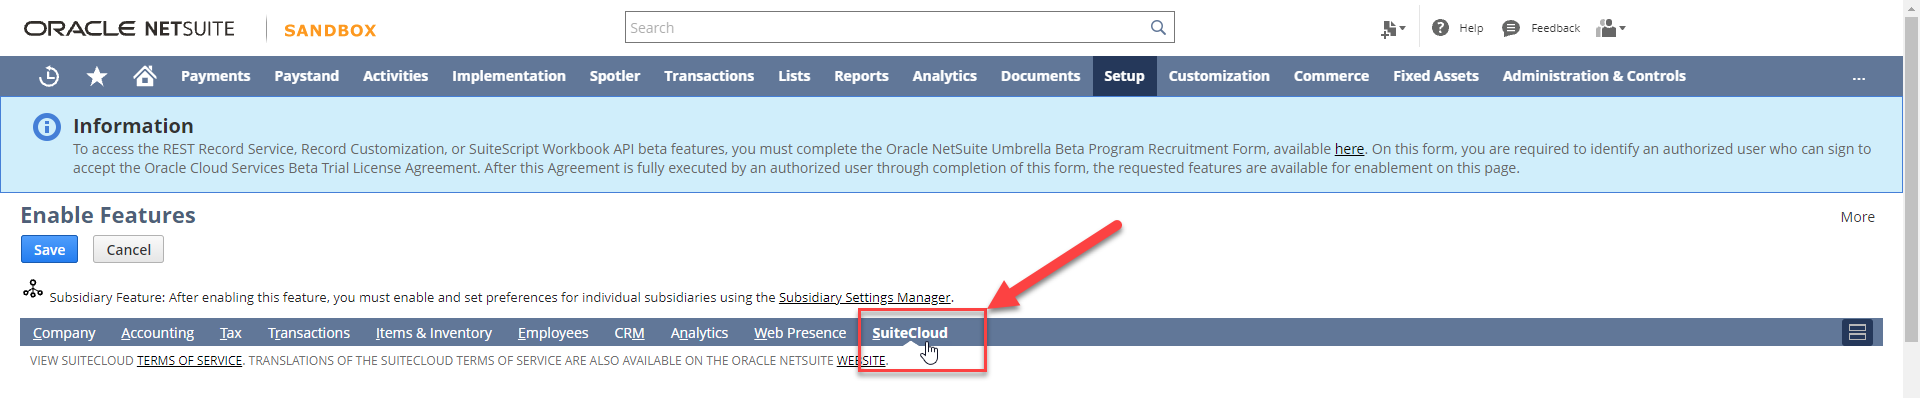
Enable Features
Navigate to Setup>Company>Enable Features.

On the Enable Features page, select the SuiteCloud option.
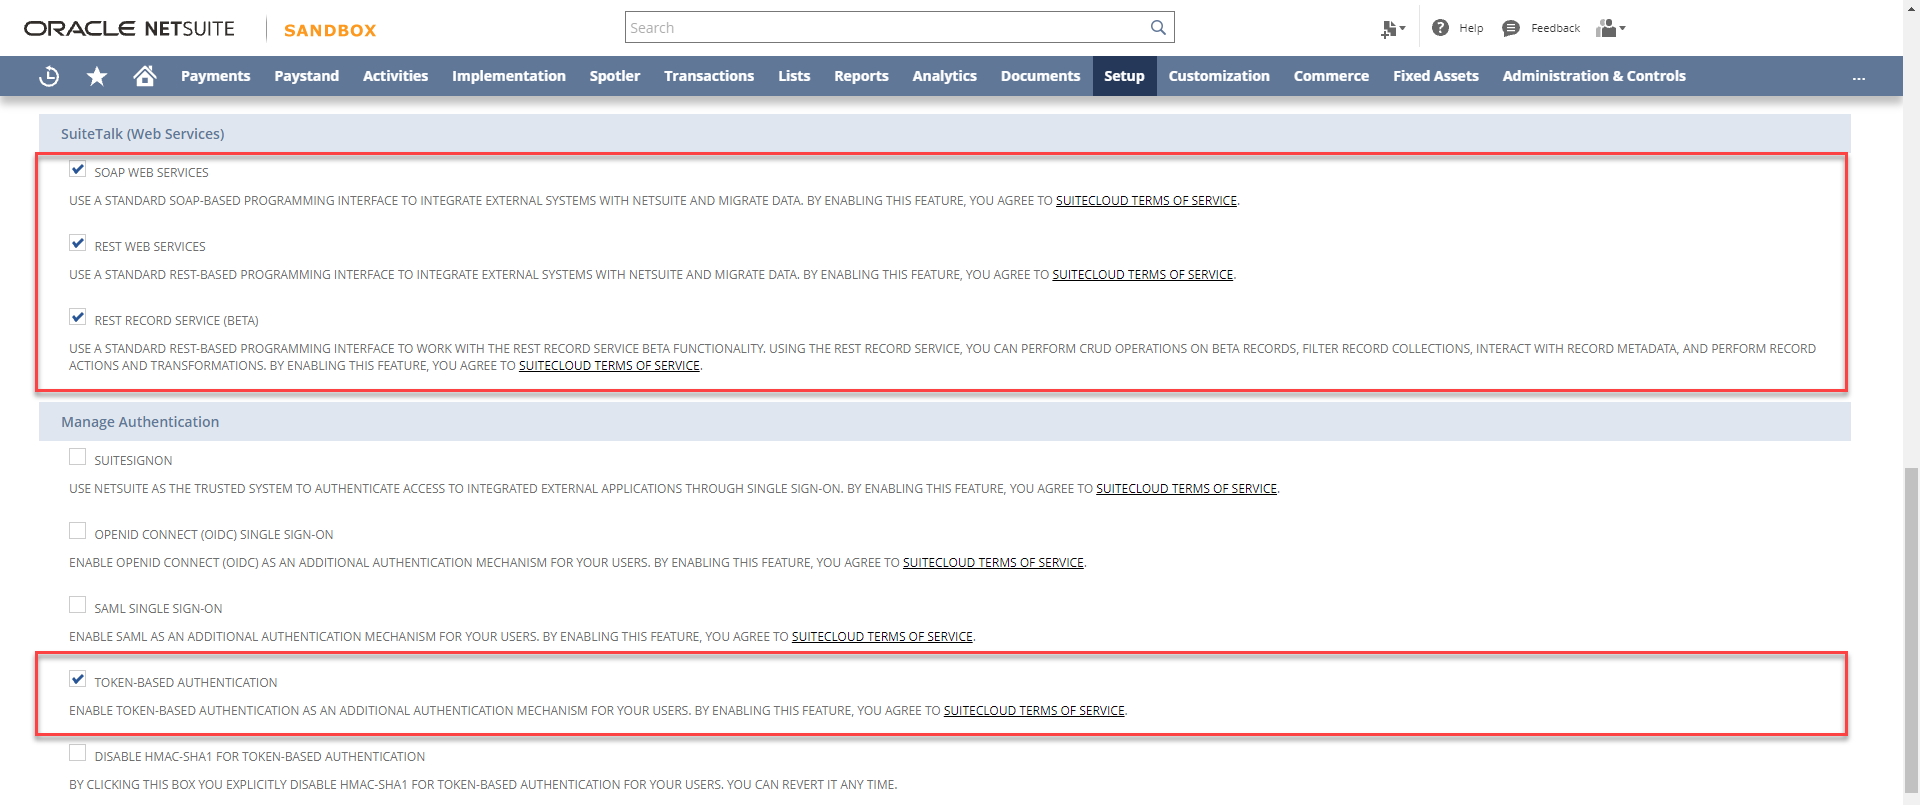
And ensure all SuiteTalk (Web Services) and Token-Based Authentication (Manage Authentication) are ticked. Then save.
After configuring and acquiring details from your NetSuite account, simply enter them into the NetSuite Connection in your Appenate account, and hit save.

Upon seeing a green connected tick, indicating the connection has successfully been authenticated and now you can continue to add NetSuite Data Source Connectors to pull data into the platform for use in forms or NetSuite Form Connectors to push data into your NetSuite account when a form is uploaded.
Troubleshooting
- Receiving a "401 Unauthorized, with a message of "Invalid login attempt. For more details, see the Login Audit Trail in the NetSuite UI at Setup > Users/Roles > User Management > View Login Audit Trail."
Check the permissions assigned to the role that's used in the token have sufficient privileges.
See here for more info https://docs.oracle.com/en/cloud/saas/netsuite/ns-online-help/bridgehead_4248124361.html
In addition to this, Grant the account detail to the reports tab on the role, and Accounts on the lists tab for the role.
- Receiving a "The account record is only available as a beta record. Enable the REST Record Service (Beta) feature in Setup > Company > Enable Features to work with this record."
You will need to follow the steps in the error message. However, the REST Record Service (beta) feature is not automatically available. You may have to apply to Oracle Beta Programs to enable the feature. This process may take some time to complete.
